DIY music synth
Posted on 05 January 2020 in hardware
A while ago a colleague went to the 2019 CCC camp somewhere in Germany and brought back a music synth he made there. I got excited! I've always been interested in making music: from the mini keyboard I got from Christmas when I was 10 to the music maker software I was using in the 90s via my love of music games (guitar hero, rockband, taiko no tatsujin, etc.). Using real instruments is fine but I enjoy more the electronics ones.
Intro
There are several music synth on the market and one of the most emblematic for me is the Teenage Engineering PO series and their OP-1.
Cool but expensive devices.
If you know where to look, you can have access to a multitude of open source hardware synths.
The clone family
The DIY
- 8BitMixtapeNEO, weird little board programmable through sound,
- Ardutouch, Arduino-based synth,
- Moog-style synth,
- Pentatonic synth,
- etc.
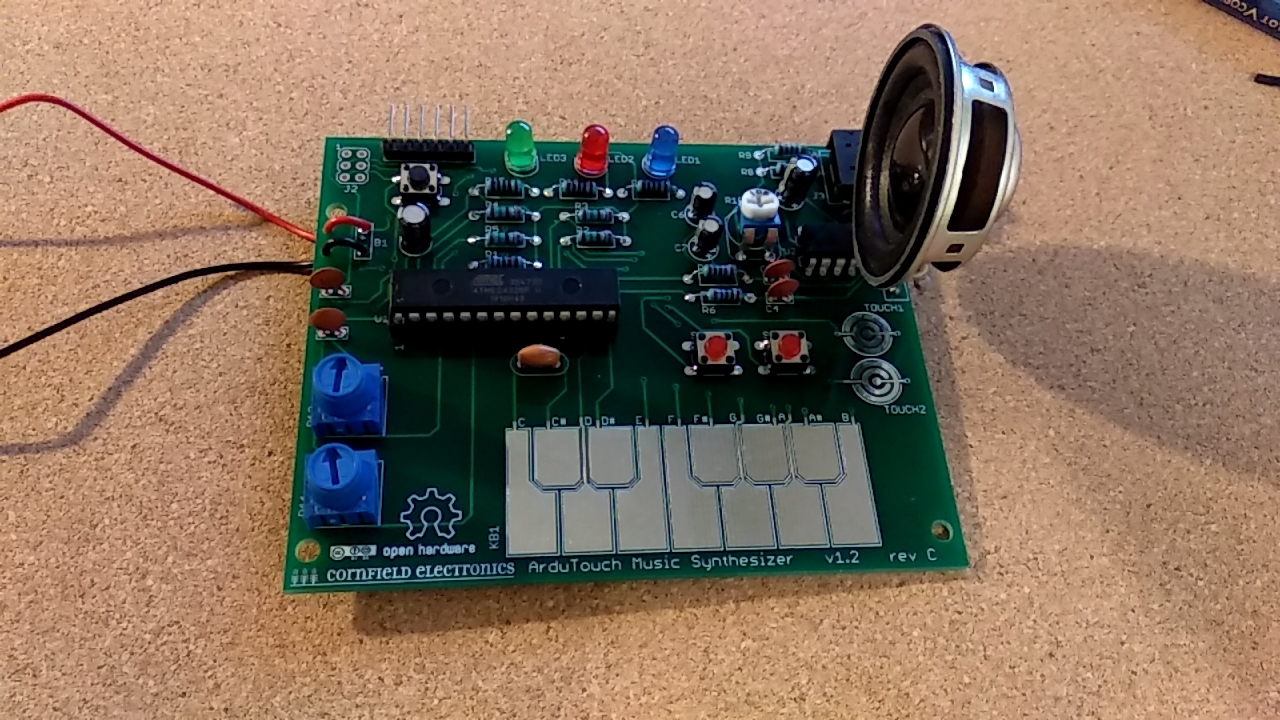
The beast
The music synth I will talk about is the Ardutouch, an open hardware device made by Mike Altman. The device serves also as a platform to teach people how to solder which is cool. The Ardutouch is basically an Arduino with a few knobs, an audio jack, a speaker and a capacitive keyboard.
It sounds pretty cool and I wanted to try to build from scratch some device, meaning sourcing the BoM (Bill of Materials), having the PCB printed by a shop, solder it and up some code on the device.
Since the Ardutouch is simple and open hardware I decided to build one.
Build
Sourcing the parts
BoM
I used my go-to website for my electronics needs: Aliexpress. My friend A uses e-bay for that but at the end it's basically different front shops for the same people behind. As always with orders coming from China, it takes roughly a month to arrive (if it arrives, but I never had problems).
I didn't pay too much attention to some of the parts I ordered and I had a couple of interesting surprises:
- blue resistances: A told me that it was 1% precision and therefore more expensive than the regular beige ones,
- audio jack: I got a non-switched version (3 pins) and that bit me later on.
PCB
The nice folks at pcbway helped me with the PCB files and the issues with versioning. I think I received everything within 2 weeks. No problem with the PCBs so far.

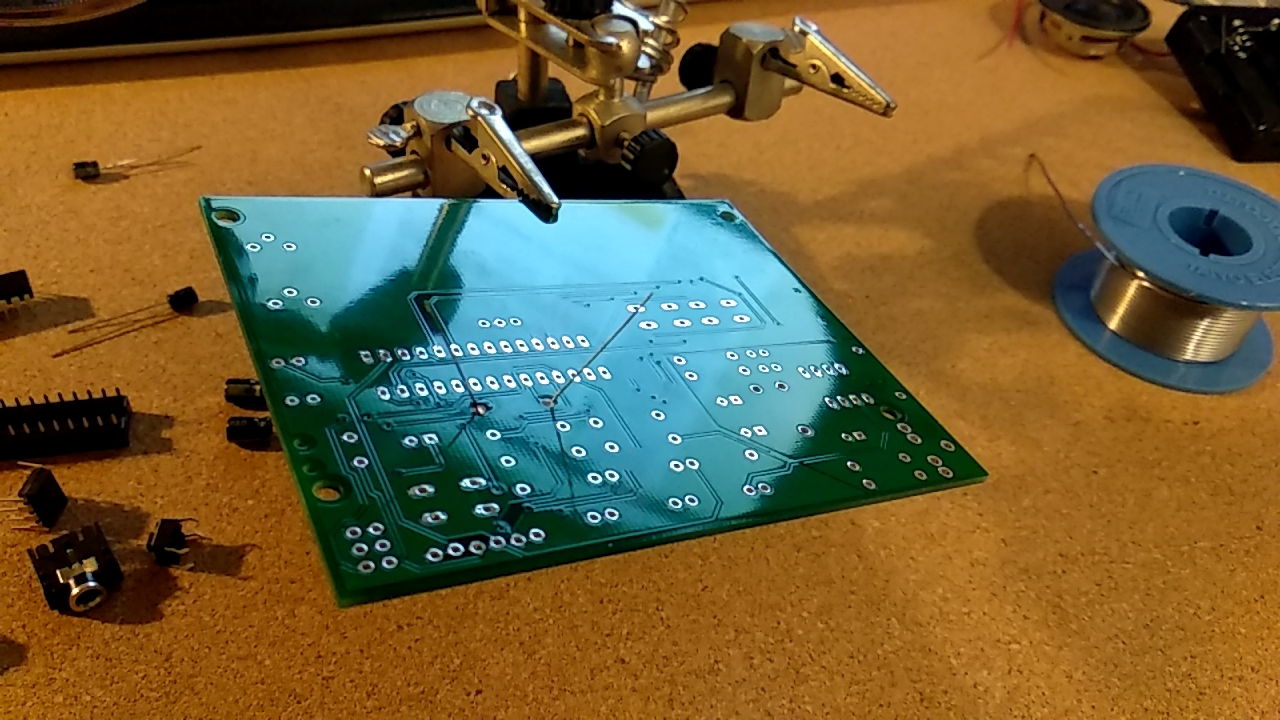
Soldering
I used to solder a lot when I was a kid. Nothing fancy, just a class where most of the time was spent building projects. After getting reacquainted with soldering on Youtube, I dived in and soldered all the parts.
A few parts were a pain to solder like the speaker and the 6-pin input. This is where you realize that having good octopus hands for electronics help.
Setup
After the soldering was done, it was just a matter of plugging everything and I could start playing some nice tunes right? Nope.
ATmega
First I didn't realize that the ATmega328P-PU I had were "blank", fresh from the factory. I tried to burn an Arduino bootloader via a breadboard and an extra Arduino laying around. It didn't work and I bricked somehow my Arduino in the process.
I went to A to get some help as he knows way more than me about these things. First we had to put the Arduino bootloader which is just setting the fuse bits to a specific hexa number and then we would be able to up arduino sketches to the ATmega328P. After a few failures, we successfully uploaded a sketch to the chip!
Speaker
After having the chip up and running, we could get the speaker to output any sounds. When we plugged the jack, we could hear sounds but nothing else from the speaker. Weird.
Remember when the audio jack I ordered? They had 3 pins. After looking at the schematics, we realize that we were missing pins so there would be sound when the headphones are not plugged.
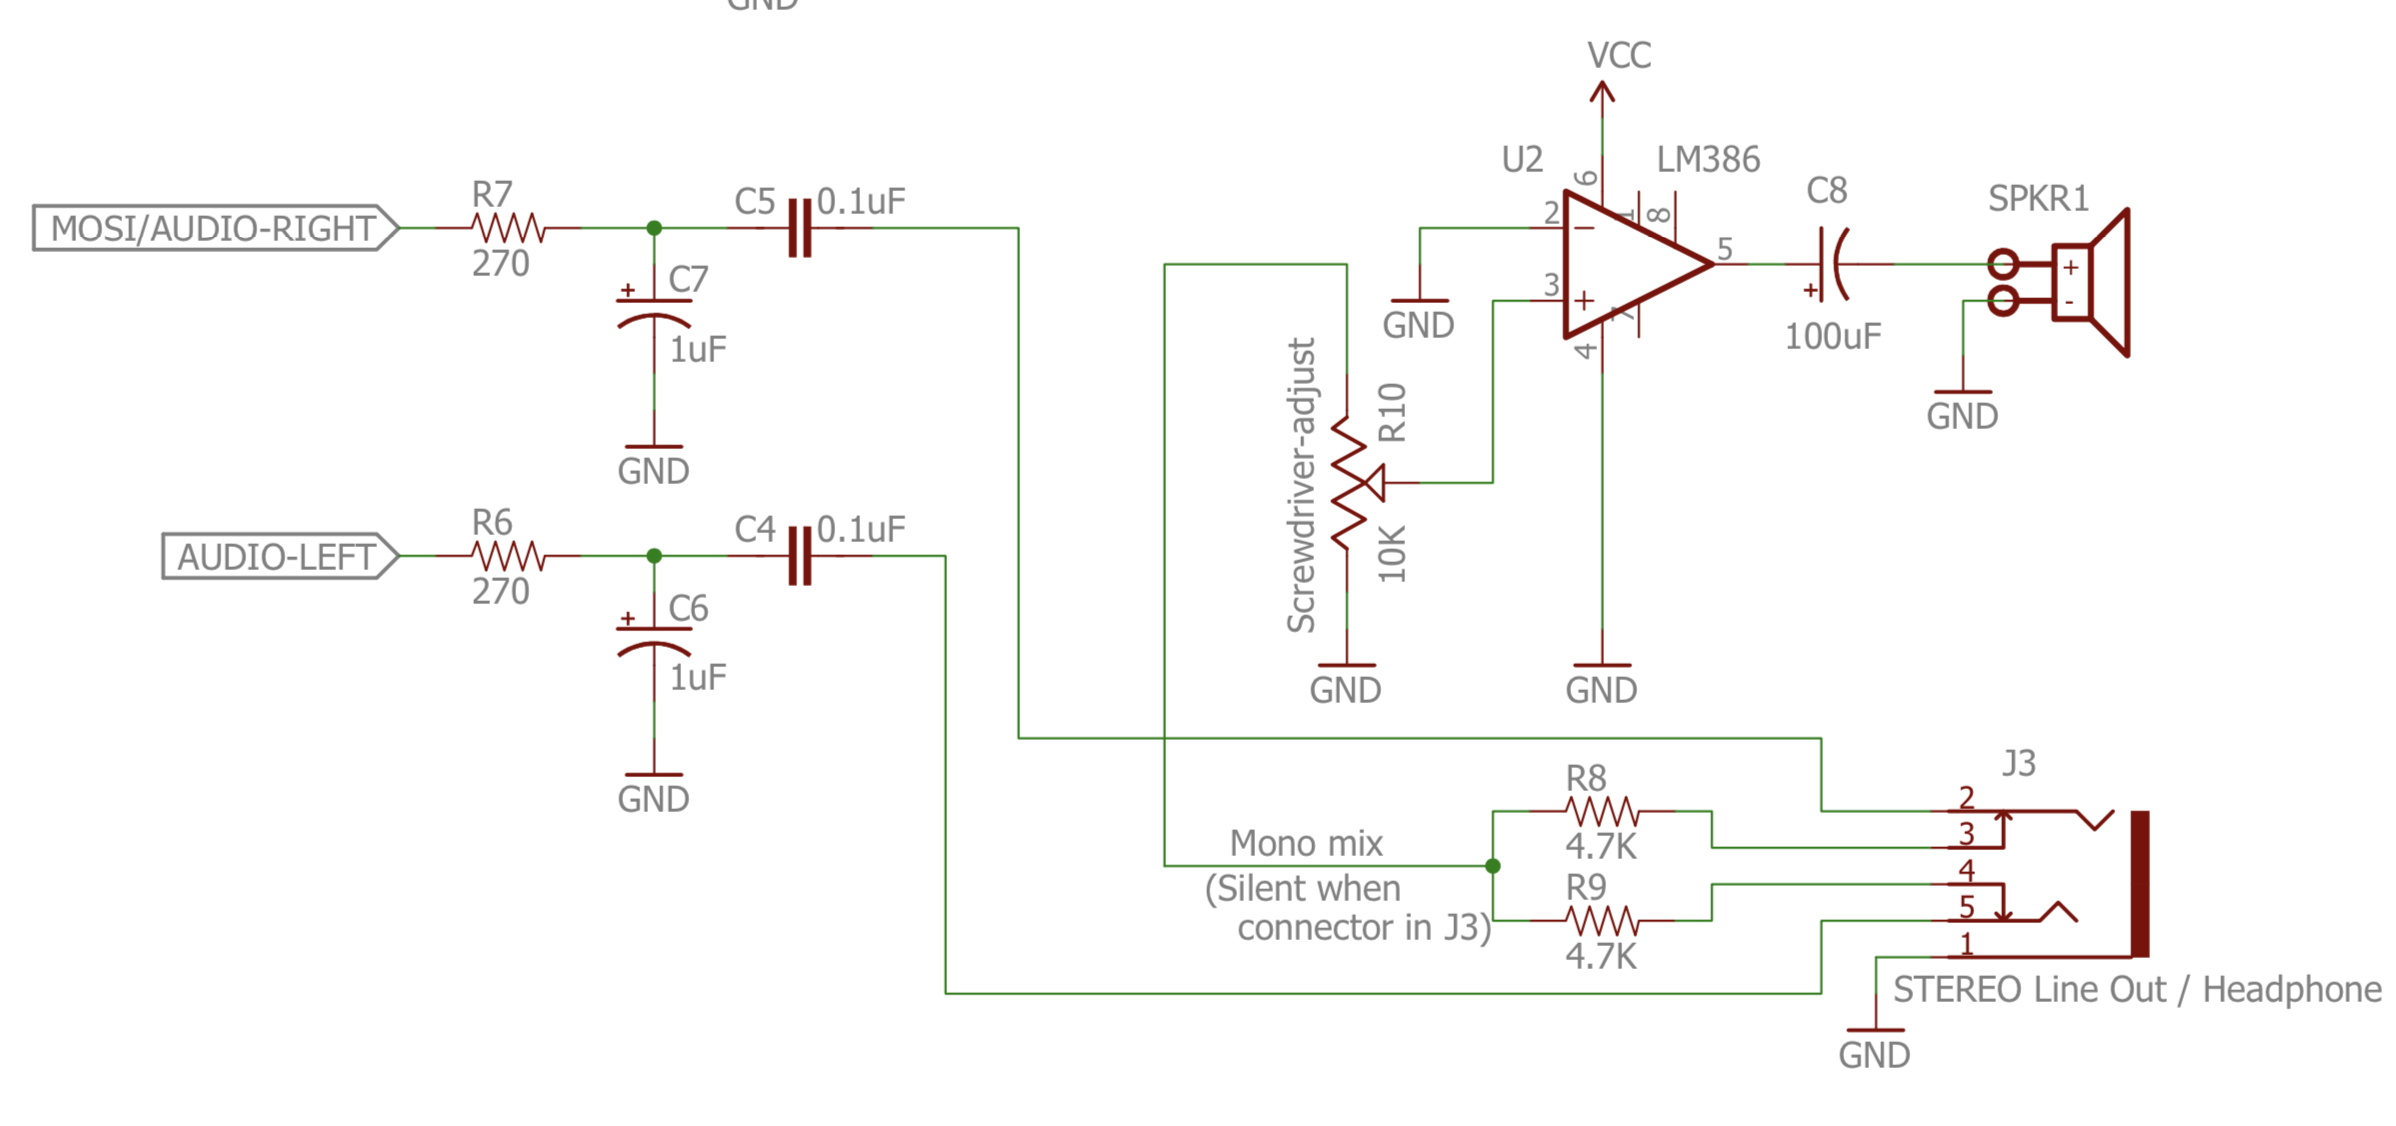
We soldered pin 2 to 3 and 4 to 5 and voilà, music from the speaker was pouring.
FTDI Cable A FTDI cable is used to upload sketch through the 6-pin connector but mine doesn't seem to work. I need to sort this out and I will have all my problems solved.
Improvements
After playing with it, I have a few improvements I would like to make:
- Remove the speaker: the quality of the speaker and the space it takes up make it useless,
- Add a li-on battery: it would be easier to charge and less bulky but will increase price of the kit,
- Add a USB power cable: just plug it in the 6pins connector (linear or rectangular one),
- Add pins to the keys to connect to objects: that would add some fun functionality,
- Make a case: it would isolate the circuit so no key inputs are triggered when we touch the board),
- Replace keyboard by buttons: it should free up some pins for the uC to add other inputs,
- Add a switch on the board: my battery holder didn't come with a switch and I prefer to have something on the board anyways.
Conclusion
For a first hardware project, I'm happy with the result. I learned a lot about making and debugging your own hardware. The soldering was not difficult but I'm curious about the assembly option of pcbway (they source and solder components to your board).
The Ardutouch is a simple enough project to start and build up
experience with building hardware, more challenging then uploading blink to
your Arduino.
References
- Logic Noise series from Hackaday
- Audio jack connectors